

Credits
CleverThis uses a prepaid credit wallet for billing. Credits are purchased via Stripe and stored in your workspace wallet. Each API token consumed deducts a fractional credit from your balance. There is no monthly subscription — you pay only for what you use.
1 credit = $0.01 USD. Credits are non-expiring. They are non-refundable once purchased, except in the case of account closure (see below).
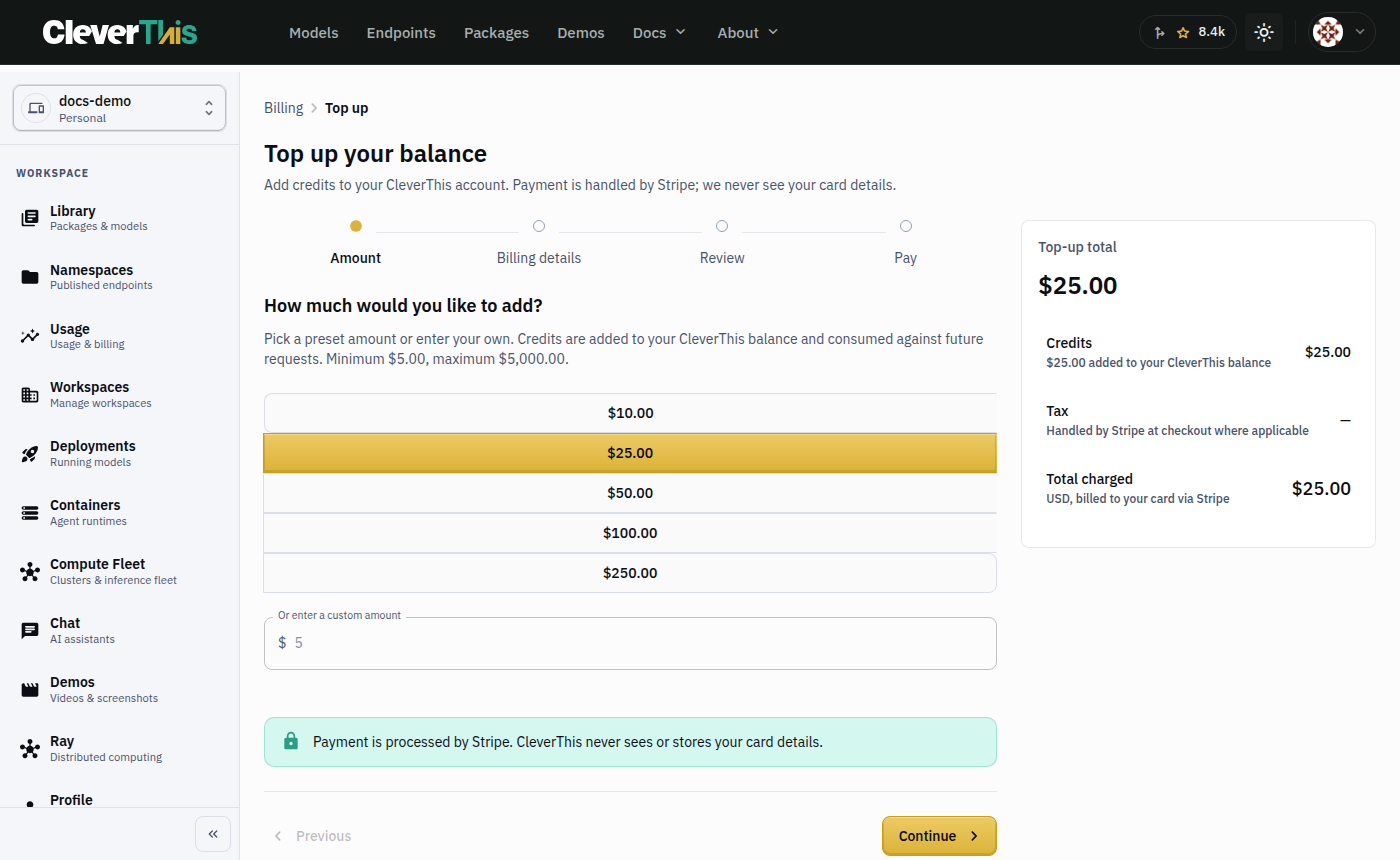
Adding credits (top-up)
- Navigate to Usage & Billing in the sidebar.
- Click Add Credits.
- Enter the amount you want to add:
- Minimum: $5 (500 credits)
- Maximum per transaction: $1,000 (100,000 credits)
- Click Continue — you are redirected to a Stripe-hosted checkout page.
- Enter your card details and complete the purchase.
- You are redirected back to CleverThis. The new balance appears immediately.
Stripe handles all payment processing. CleverThis never stores your card number. You will receive a Stripe payment receipt via email.
Auto top-up
Configure automatic top-up to keep your balance above a minimum threshold and avoid
402 Payment Required errors in production.
- On the Usage & Billing page, click Auto Top-Up Settings.
- Set a minimum balance threshold — when your balance drops below this amount, an automatic charge is triggered. Example: set to 1,000 credits ($10) to recharge before you run out.
- Set a top-up amount — how many credits to add when the threshold is crossed. Example: set to 10,000 credits ($100) to recharge in meaningful chunks.
- Add a saved payment method in Stripe. Click Manage payment method to open Stripe's payment method manager.
Once configured, CleverThis triggers a Stripe charge automatically when your balance dips below the threshold. You receive a Stripe email receipt for each automatic charge.
Auto top-up limits
To prevent runaway spend, auto top-up will not trigger more than once per hour and will not charge more than $500 per day in automatic charges. If your usage exceeds these limits, you will receive an email notification and will need to top up manually.
Disabling auto top-up
To disable auto top-up, return to Auto Top-Up Settings and toggle the Enable auto top-up switch to off. Pending charges that were already triggered will still complete.
Spend alerts
You can set a spend alert to receive an email notification when your monthly spend reaches a threshold:
- On the Usage & Billing page, click Spend Alerts.
- Enter a monthly spend threshold in credits.
- Enable the alert toggle.
The alert fires once per month when your spend crosses the threshold. It does not block requests — it is a notification only. To block requests above a certain spend, use per-endpoint cost caps in namespace endpoint configuration.
Balance on account closure
If you close your workspace while your wallet has a non-zero balance, contact support before deleting your account. CleverThis will process a refund for the remaining balance to your original payment method. Refunds may take 5–10 business days to appear on your statement.
Account deletion without contacting support first will result in balance forfeiture. CleverThis does not automatically refund balances at account closure.
Invoice history
All successful charges appear in the Invoice History section of the Usage & Billing page. Each invoice entry shows:
- Date and time of the charge
- Amount charged
- Credits added
- Stripe receipt link (for PDF receipts)
Invoices are retained indefinitely and are available for download from Stripe's customer portal. Click Manage billing on Stripe to access Stripe's full billing portal, which includes downloadable PDF invoices for accounting purposes.
Credit pricing vs USD pricing
Usage stats in the CleverThis UI display costs in credits (1 credit = $0.01 USD). Invoice amounts from Stripe are in USD. To convert:
USD = credits / 100
credits = USD × 100
For example, 1,250 credits consumed = $12.50 USD billed.
In-flight requests when balance hits zero
If your balance reaches exactly zero while a request is being processed, that request
completes and is charged. The next request after the balance reaches zero receives
402 Payment Required.
If auto top-up is configured, the charge typically completes within 1–2 seconds of the
balance dropping, but there may be a brief window of 402 responses in high-traffic
situations. Design your application to retry on 402 with a short backoff (1–3 seconds)
when auto top-up is enabled.